
Learn how to create an application for Android very simply using App Inventor 2.
In the fields of robotics and connected objects, one of the most interesting features to implement is the remote control of an electronic project. Whether to display measurements from his home or to drive a drone, a possible solution is to develop a smartphone application and communicate with a microcontroller using a Bluetooth connection. This App can be quickly created using MIT’s online software, App Inventor 2 (AI2).
Material
- Computer
- Android smartphone with a QR code reader app
- Arduino UNO
- Bluetooth HC-06
- Dupont F / M Cable
Creating AI2 application
In this example, we create an application to enable a function (ON / OFF) and retrieve a sensor measurement from an Arduino board. This tutorial can be applied for many other applications.
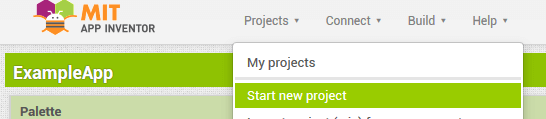
Register on the App Inventor 2 website .
Create a new project named myApp
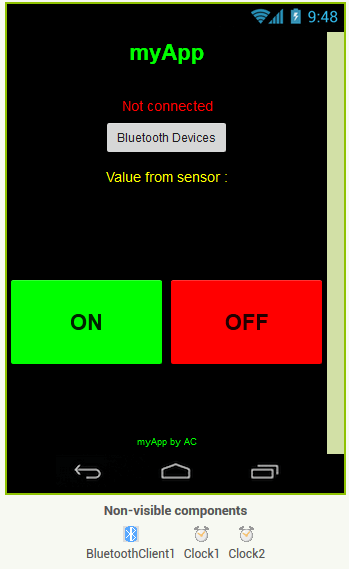
The designer screen of the project appears
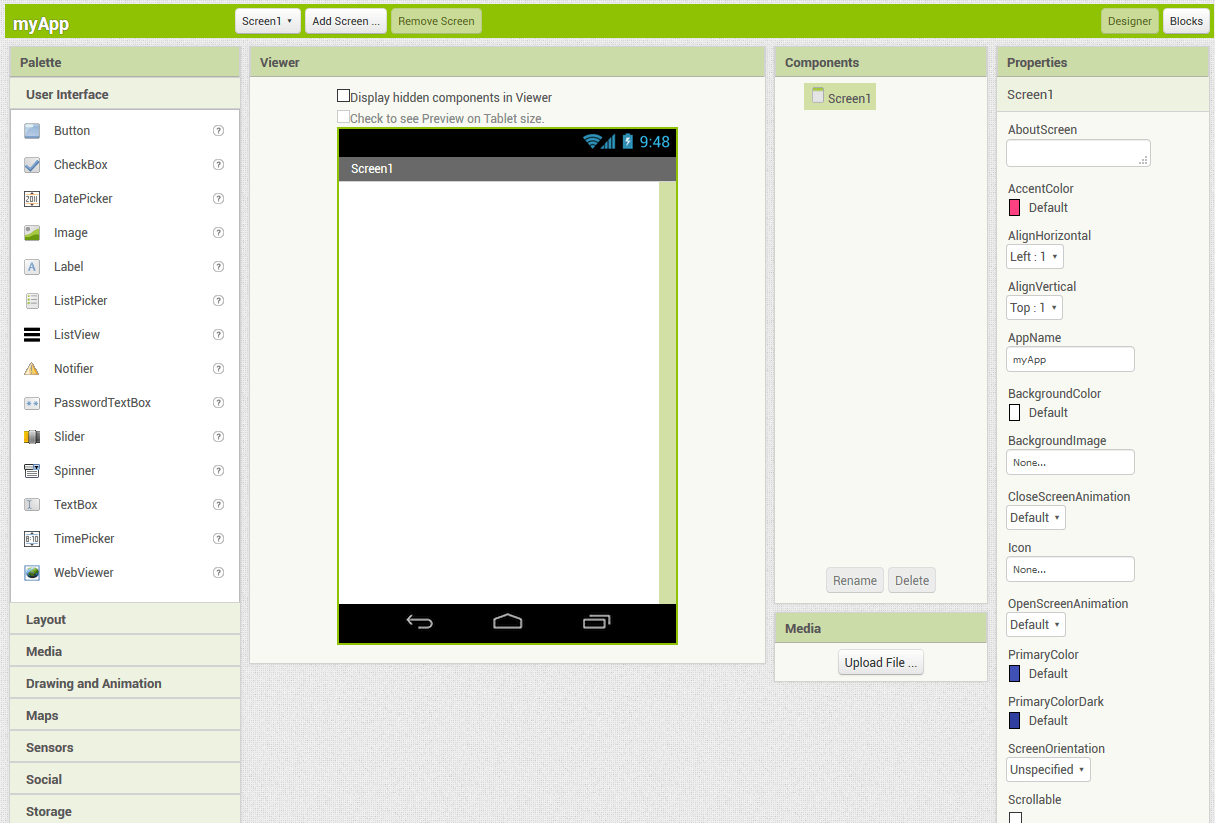
AI2 Application Configuration
To create the design of our application, we use the objects available under the tabs in the drop-down menu on the left of the screen and modify their parameters that appear on the right of the screen.
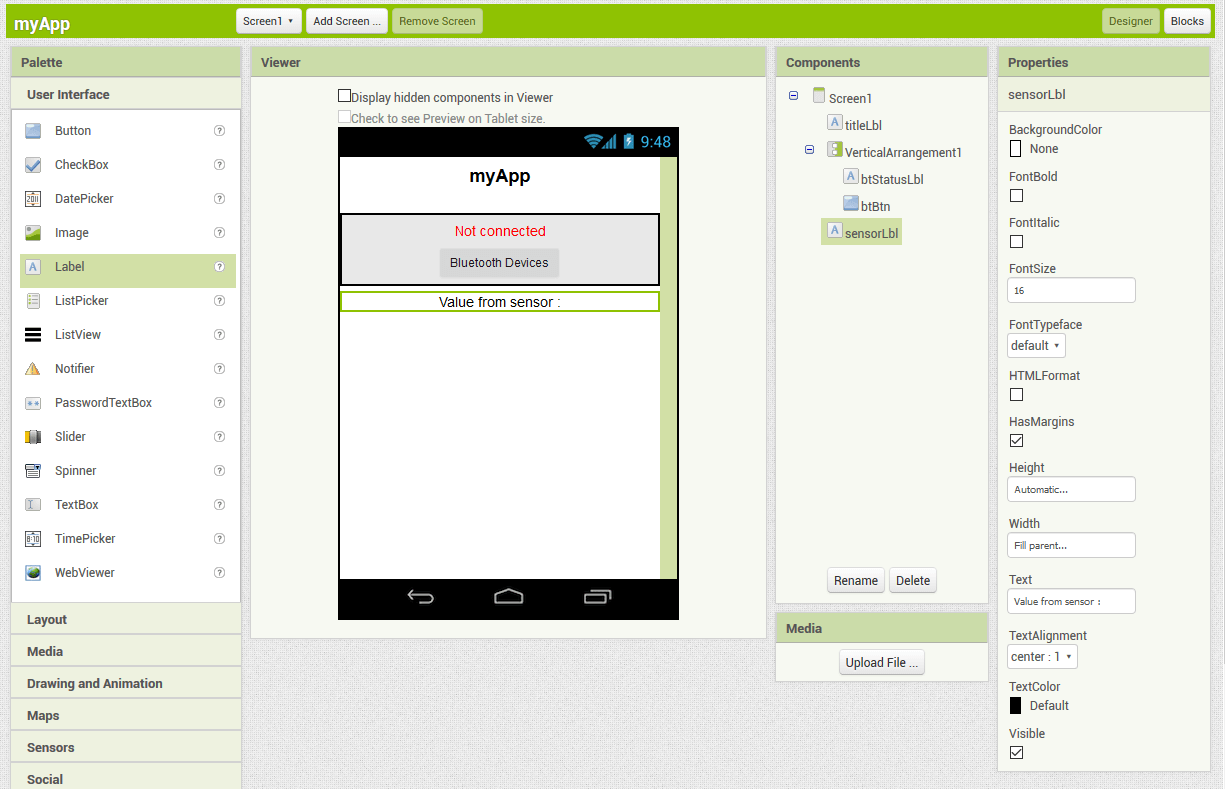
In User interface, add a label object and rename it titleLbl. It will contain the title of the application.
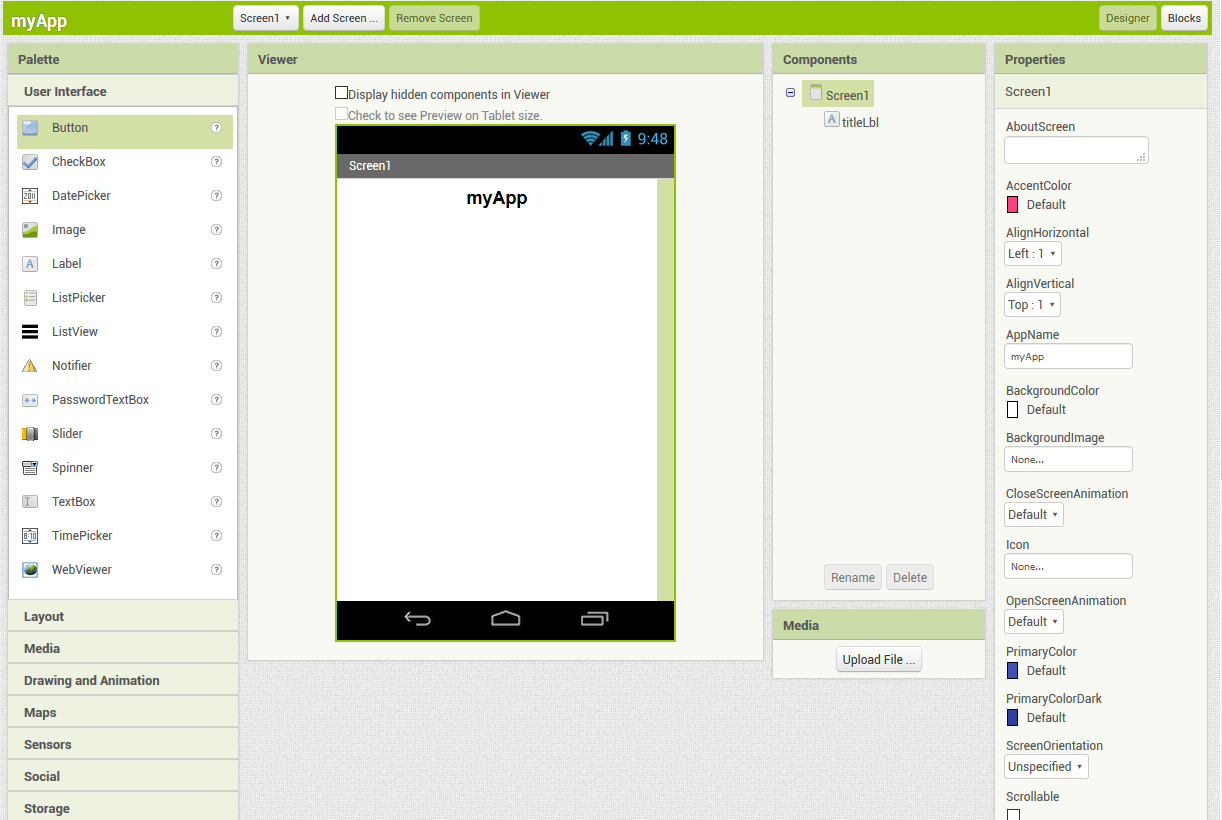
In layout, add a VerticalArrangement object that allows you to align objects vertically.

In VerticalArrangement, place a label btStatusLbl and then a ListPicker btBtn that will be used to manage the Bluetooth connection.
Then add a label named sensorLbl that will contain the value received from the Arduino board.
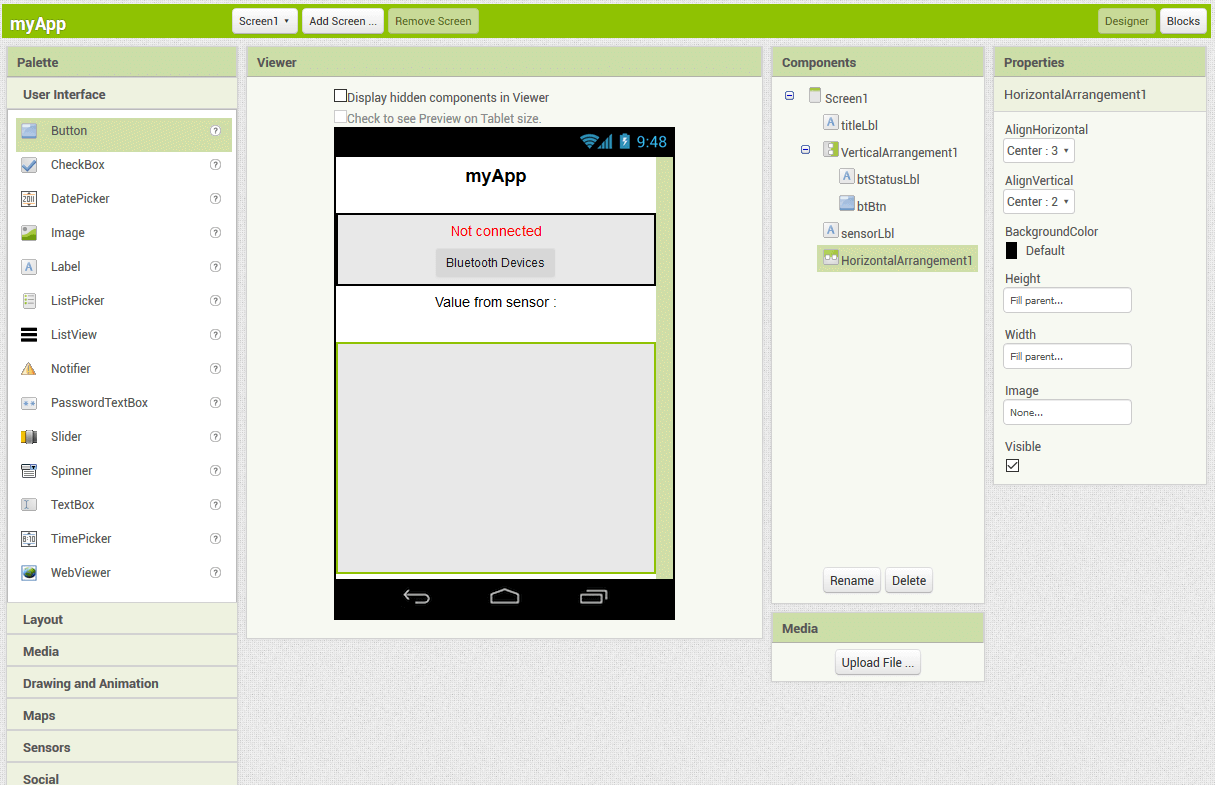
Add a HorizontalArrangement that allows you to align objects horizontally and that will contain the buttons to activate the Arduino function.
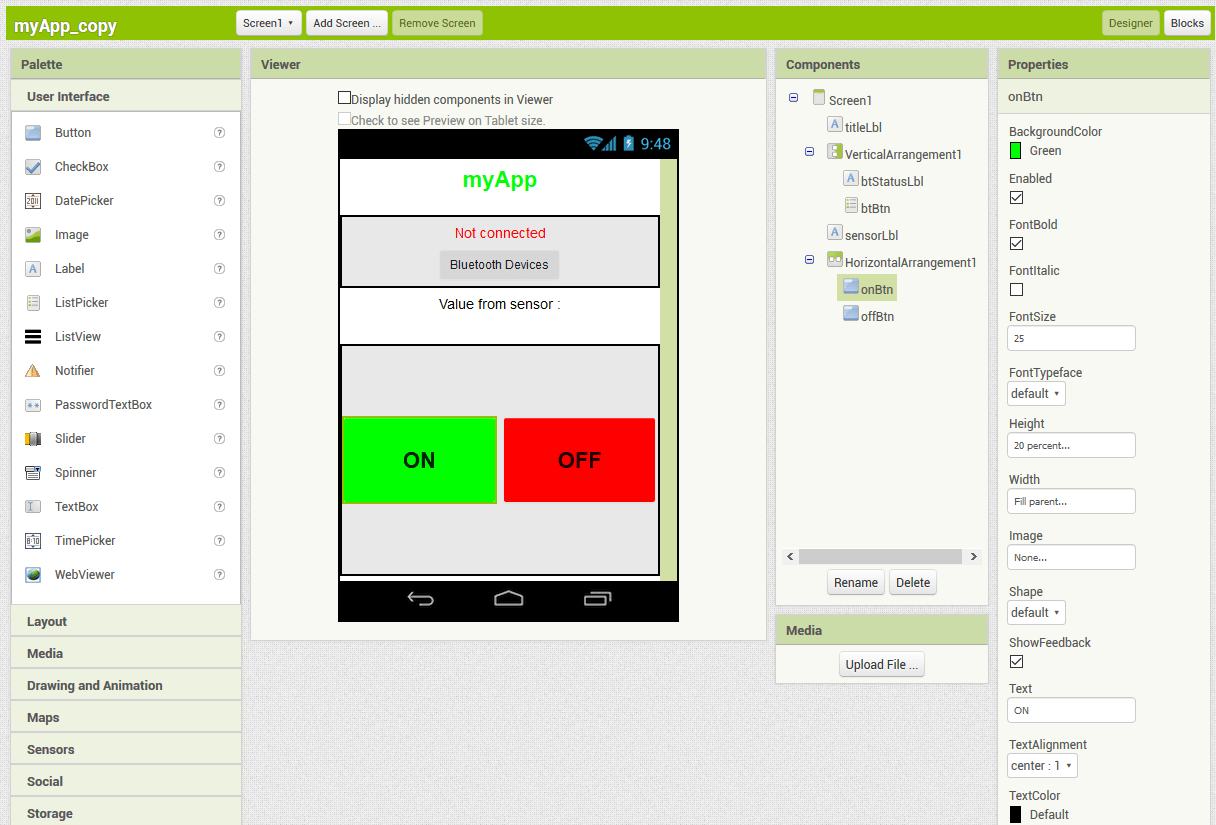
In the HorizontalArrangement, add two buttons named onBtn and offBtn.
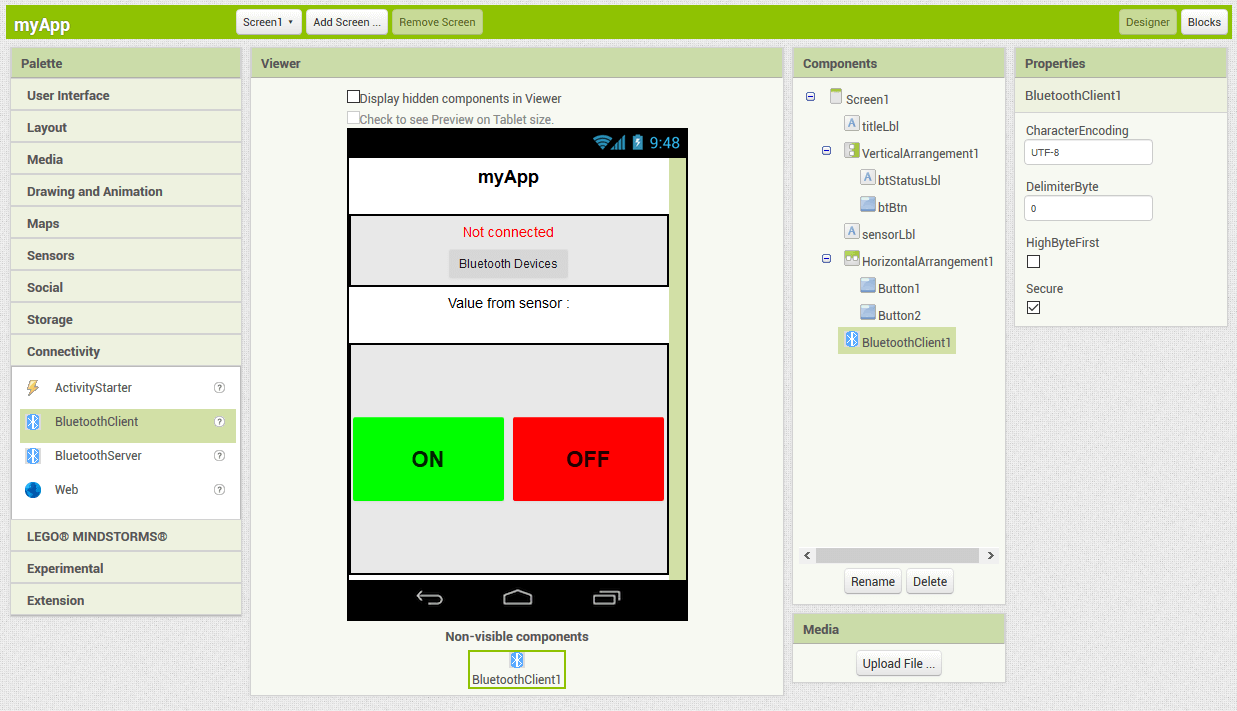
Finally, in Connectivity, add a BluetoothClient object that will allow us to interact with the Bluetooth device.
And in Sensor, add two Clock objects which will help receive and send data at a regular time interval.
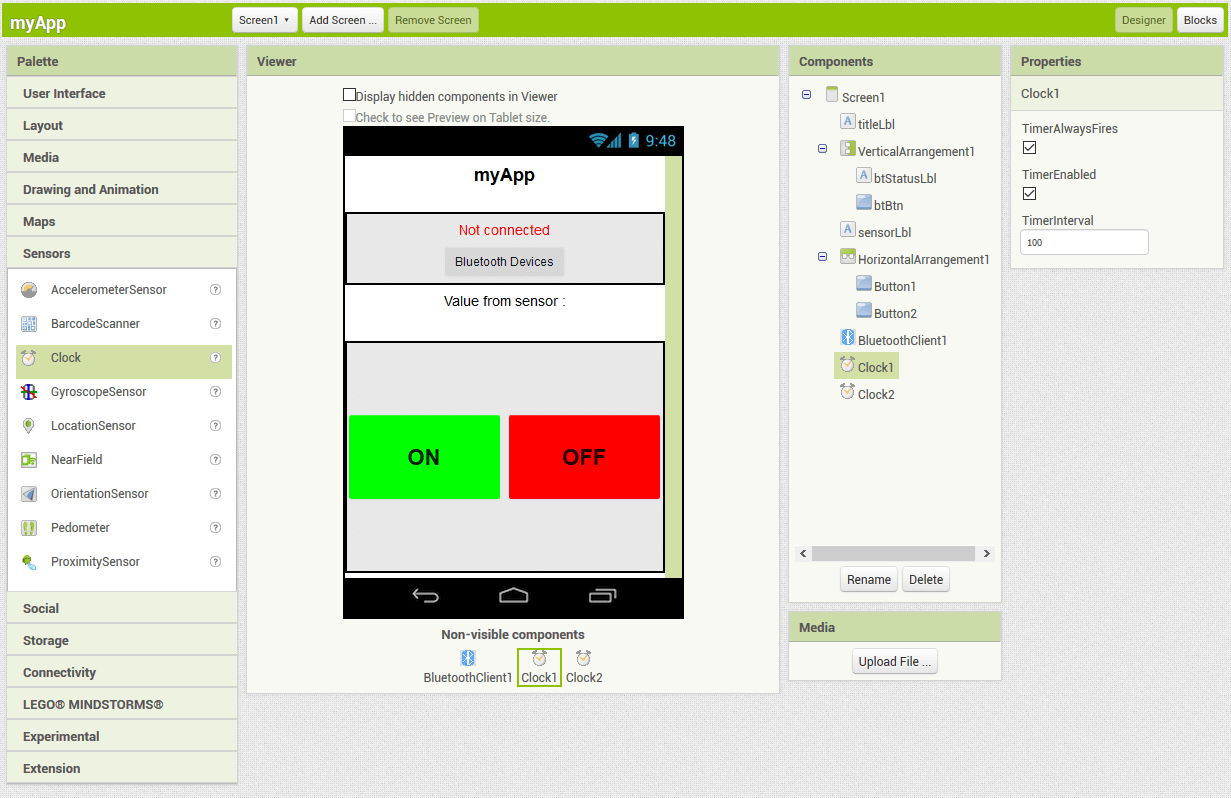
You can customize your application as you like by using different colours, fonts or images.
AI2 Application Programming
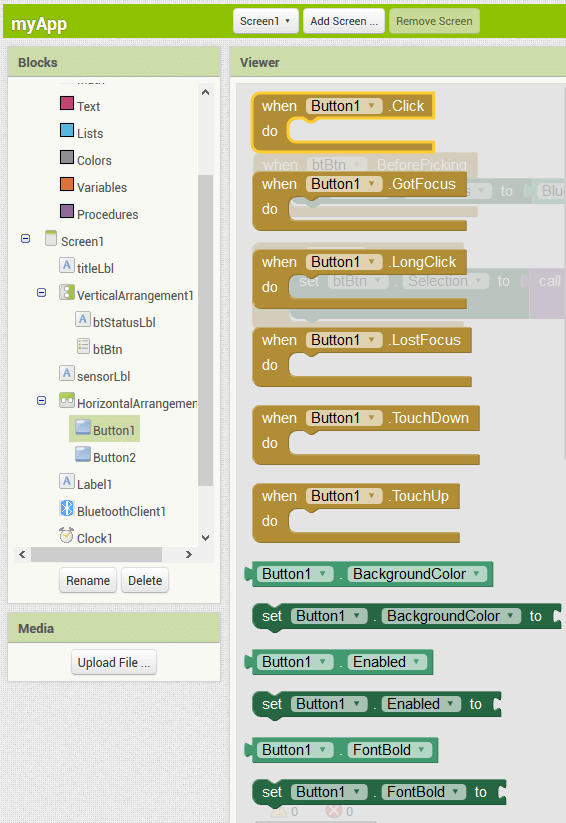
AI2 uses Scratch to program application which makes it possible to create a program in the form of block diagram. It is very easy to use but requires some programming logic.
All functions are available by clicking on the objects in the drop-down menu on the left of the screen. Browse the functions of the objects added to the app designer as well as those of the objects Variables, Text, Math and Control that we will use.
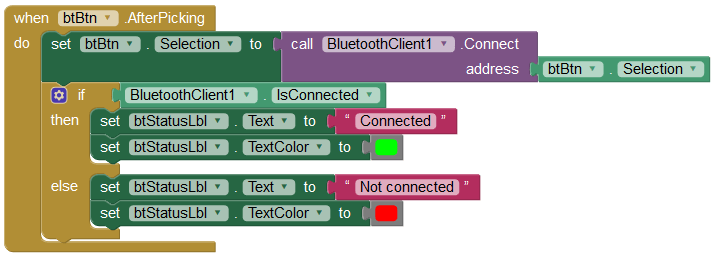
Create a list of available Bluetooth modules on the device.

Manage establishment of the connection and change the label according to the connection status.
A global variable “command” is defined in order to keep in memory the value given by the last button pressed (ON or OFF).
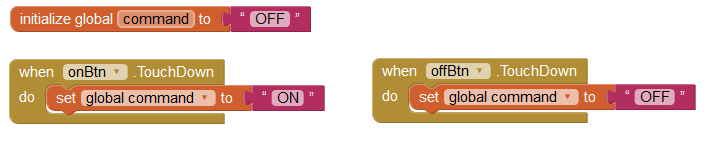
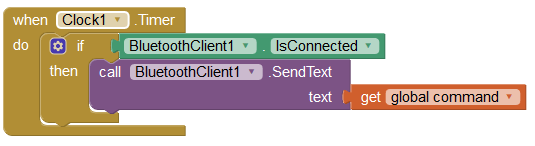
The value of command is sent via Bluetooth, if it is connected, at a frequency defined by the object Clock1.
To recover the value of the sensor sent from Arduino, we check if data is available in the buffer with a frequency defined by Clock2. We then display this value in sensorLbl.

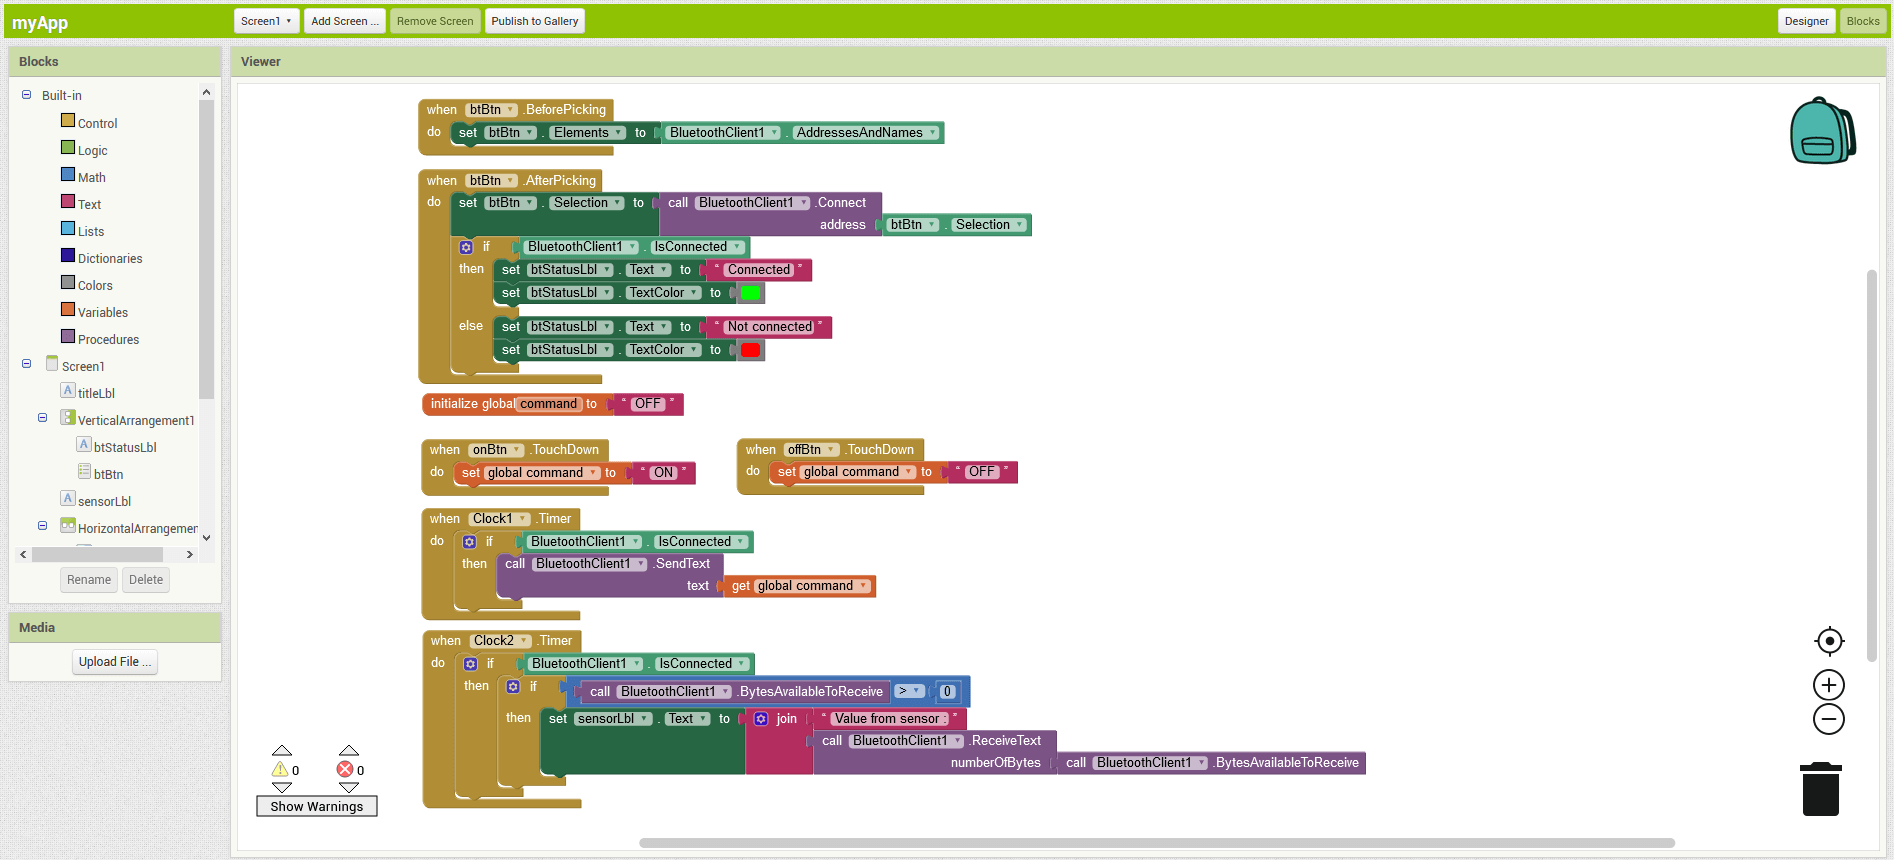
Complete Code
Once the blocks are placed and configure properly, the code should look loke this
Compile and share your Application
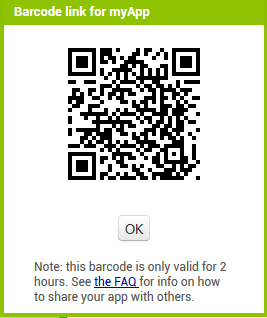
Once this program in Scratch is correctly configured and displays no errors, install a QR code reader application and compile the program using the menu Build> App program (provide QR code for .apk)

Once the QR code has been generated, you can download and install the application on your Smartphone.
You can share the installer .APK so that other can install your App on an Android phone. You can share your project as a AIA file so that other can use and modify your application.
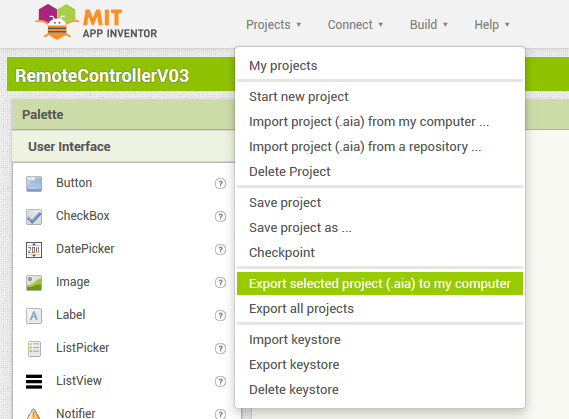
Export to create the AIA file on your computer
Import to open a AIA file fro your computer to the online software

Arduino Code
Here is the code to upload to the Arduino board to receive and send data to the serial port.
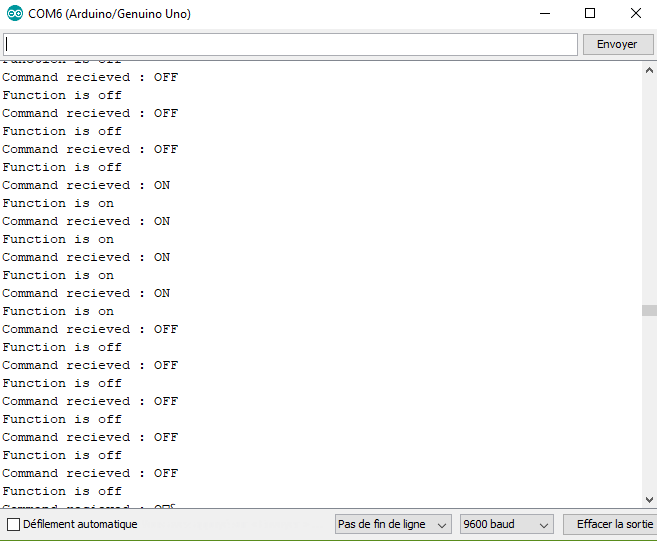
#include <SoftwareSerial.h>

SoftwareSerial hc06(2,3);

String cmd="";
float sensor_val=0;

void setup(){
  //Initialize Serial Monitor
  Serial.begin(9600);
  //Initialize Bluetooth Serial Port
  hc06.begin(9600);
}

void loop(){
  //Read data from HC06
  while(hc06.available()>0){
    cmd+=(char)hc06.read();
  }

  //Select function with cmd
  if(cmd!=""){
    Serial.print("Command recieved : ");
    Serial.println(cmd);
    // We expect ON or OFF from bluetooth
    if(cmd=="ON"){
        Serial.println("Function is on");
    }else if(cmd=="OFF"){
        Serial.println("Function is off");
    }else{
        Serial.println("Function is off by default");
    }
    cmd=""; //reset cmd
  }
  // Simulate sensor measurement
  sensor_val=(float)random(256); // random number between 0 and 255

  //Write sensor data to HC06
  hc06.print(sensor_val);
  delay(100);
}
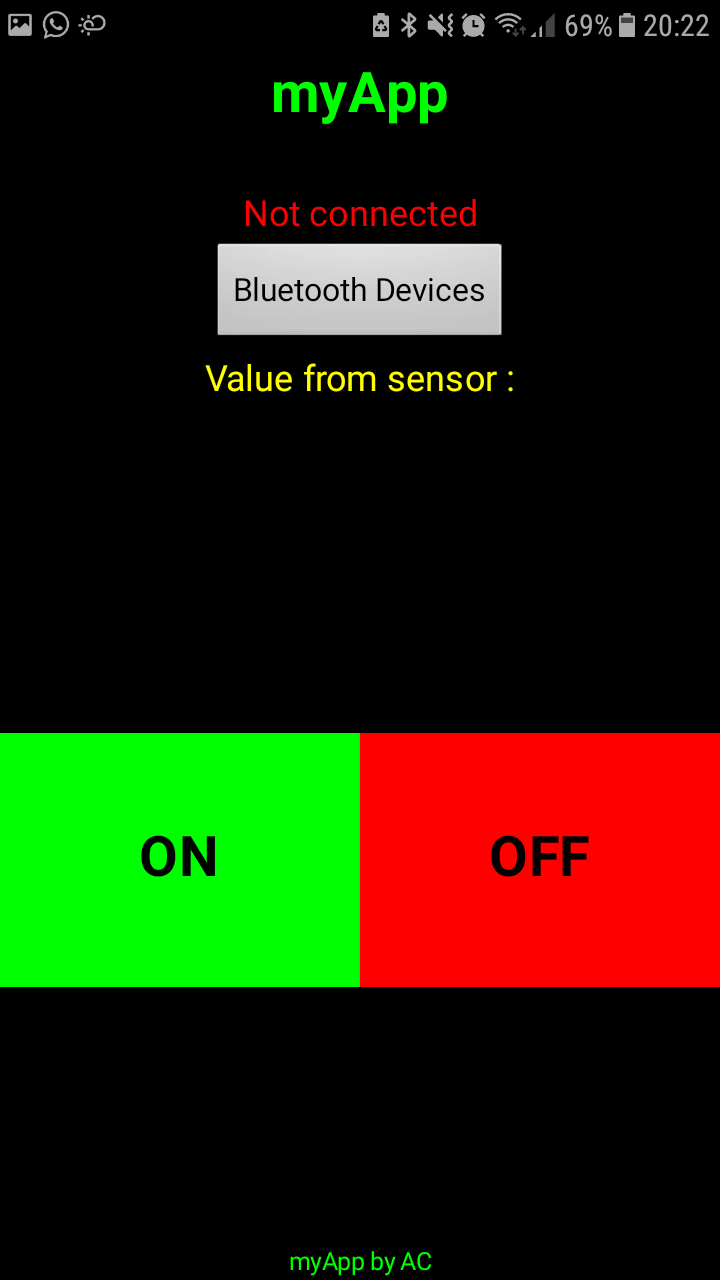
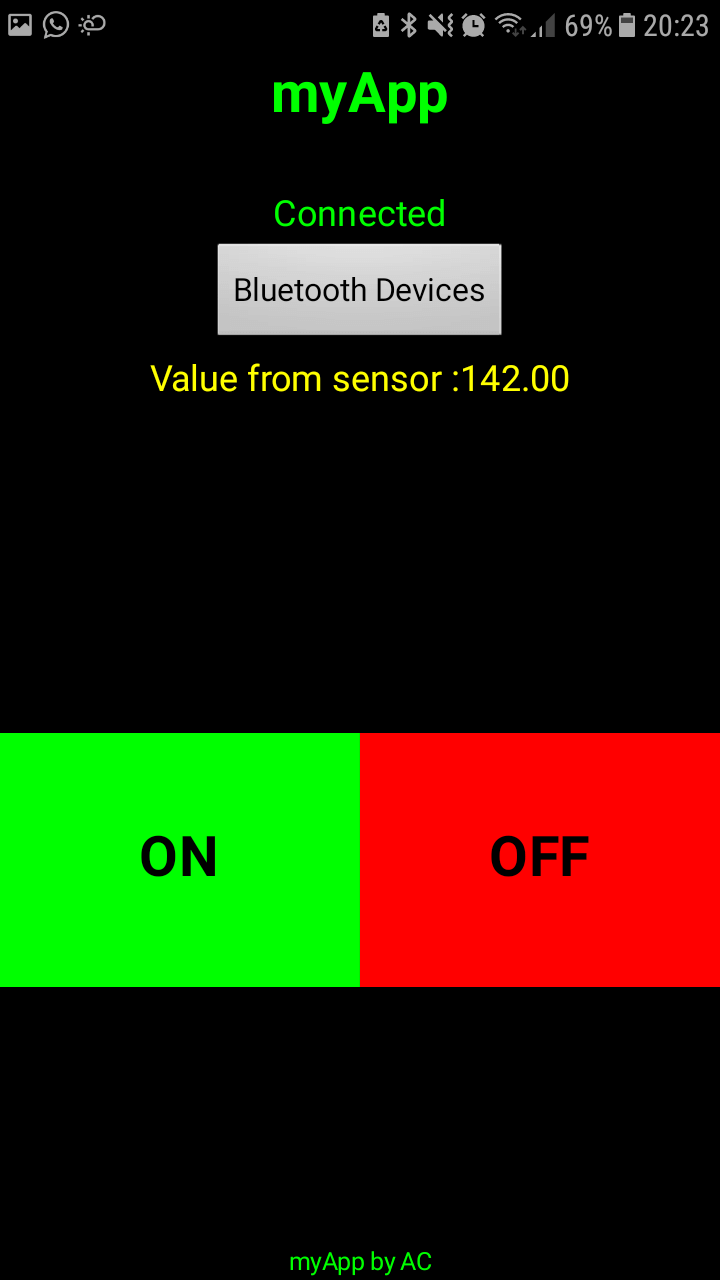
Result
We can activate and deactivate the function in the Arduino code and receive data from a sensor.
Do not hesitate to leave a comment or to send us a message if you need more information on how to create a Smartphone Application.


