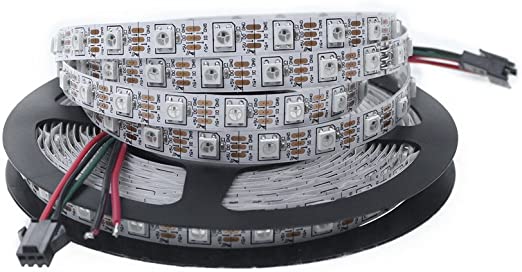
LED ribbons are made up of a succession of addressable RGB LEDs, i.e. the brightness and colour of each LED can be set independently. There are several ribbon models: single colour, non-addressable, 5 or 12V, etc. Pay attention to the model you want to use.
Hardware
- Computer
- Arduino UNO
- USB cable A Male to B Male
- LED ribbon WS2812b
Schematic

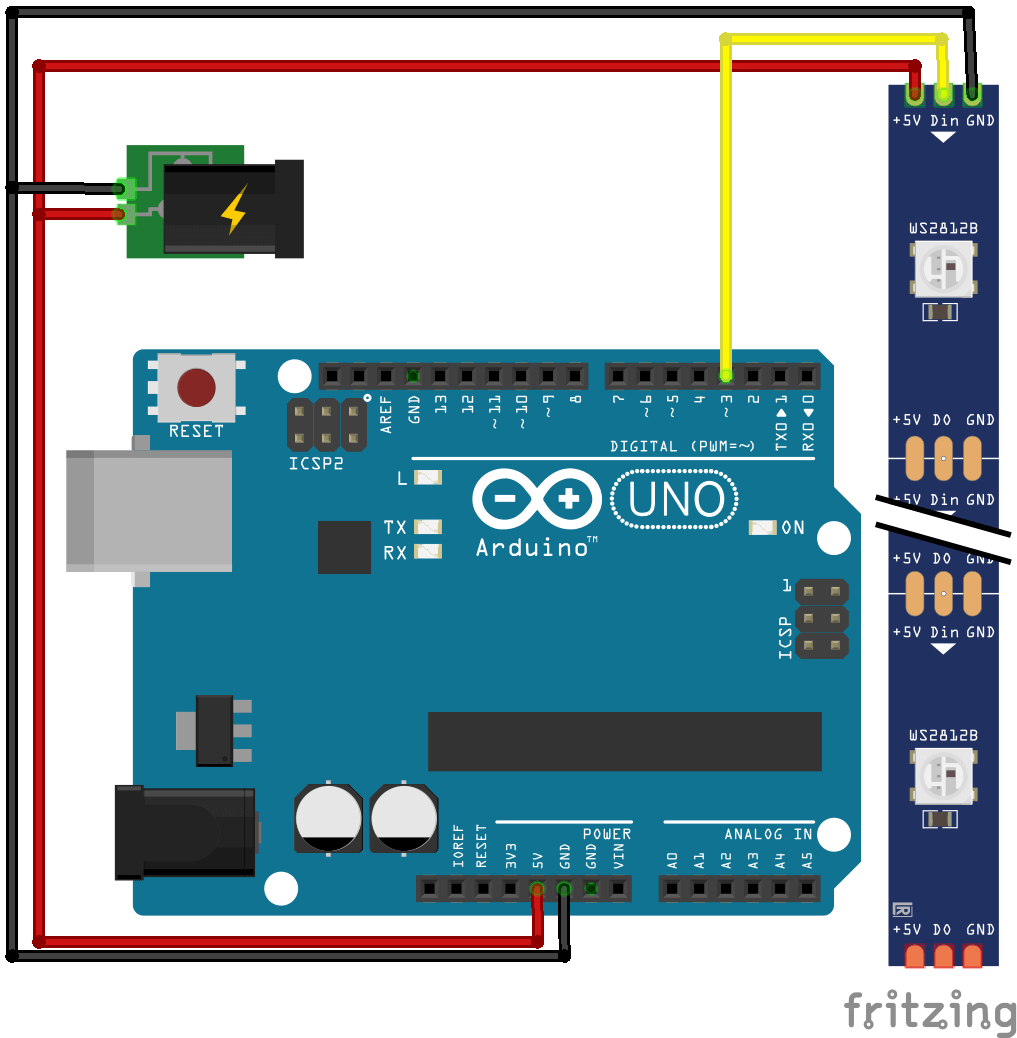
The LED ribbon uses a PWM pin on the microcontroller to determine the colour, intensity and LED to be lit. Make sure to use an external power supply to power the LEDs. An LED ribbon can be very power hungry, especially if it is long and several ribbons are powered in series. For a WS2812B LED ribbon, 50mA per LED or 2.5A for 50 LEDs is required. Check carefully the number and type of LEDs you wish to illuminate in order to choose the best voltage source.
Code
Several libraries can be used depending on the brand of the LED ribbon such as Adafruit_NeoPixel or PololuLedStrip. In this tutorial we use the FastLED.h library. To initialize the library, you need to specify the type and number of LEDs used as well as the order of colours (Red, Green, Blue) which can be different according to the ribbon models.
Once the object has been initialised, it is possible to access each LED via the LED array. It is possible to define the colour and luminous intensity of the LED i using the led function [i].setRGB() and then validating with the function FastLED.show().
//Libraries
#include <FastLED.h>//https://github.com/FastLED/FastLED

//Constants
#define NUM_STRIPS 1
#define NUM_LEDS 60
#define BRIGHTNESS 10
#define LED_TYPE WS2812B
#define COLOR_ORDER BRG//RGB
#define FASTLED_ALLOW_INTERRUPTS 0
#define FASTLED_INTERRUPT_RETRY_COUNT 1
#define FRAMES_PER_SECOND 60
#define COOLING 55
#define SPARKING 120

//Parameters
const int stripPin  = 3;

//Variables
bool gReverseDirection  = false;

//Objects
CRGB leds[NUM_LEDS];

void setup() {
  //Init Serial USB
  Serial.begin(9600);
  Serial.println(F("Initialize System"));
  //Init led strips
  FastLED.addLeds<LED_TYPE, stripPin, COLOR_ORDER>(leds, NUM_LEDS);
  FastLED.setBrightness(  BRIGHTNESS );
}

void loop() {
  ledScenario();
}

void ledScenario(void ) { /* function ledScenario */
  ////LEDS Strip scenario
  for (int i = 0; i < NUM_LEDS; i++) {
    //leds[i] = CRGB::Goldenrod;
    leds[i].setRGB(255, 0, 255);
    leds[i + 3].setRGB(255, 0, 255);
    FastLED.show();
    delay(100);
    leds[i] = CRGB::Black;
    FastLED.show();
    delay(100);
  }
}
Applications
- Create a bright atmosphere in your flat
- Creating a lamp that changes light according to the music
Sources
- Change the colour of an RGB LED
- https://github.com/adafruit/Adafruit_NeoPixel
- https://github.com/pololu/pololu-led-strip-arduino
- https://github.com/FastLED/FastLED
Find other examples and tutorials in our Automatic code generator
Code Architect


